Blog
How Do You Apply Epoxy Floor Paint Perfectly? A 4-Step Technical Coating System Guide

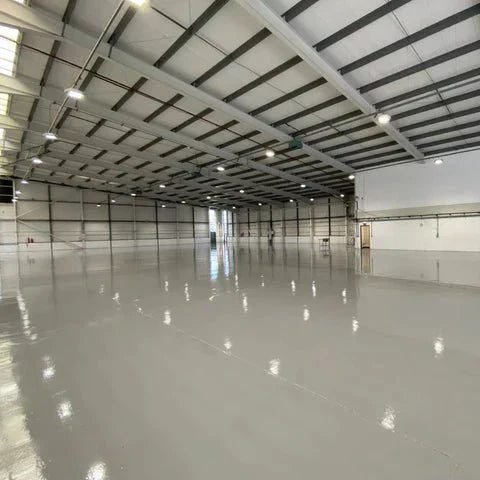
Achieving a perfect, durable garage or commercial showroom floor is visually impressive, yet the distinction between a floor that endures for 15 years and one that begins to peel within 15 weeks hinges on two critical factors: precision and preparation.
The application of epoxy floor paint involves a complex chemical and mechanical process. Whether you are an engineering contractor overseeing a busy warehouse project or a property owner enhancing a utility area, adhering to a stringent, factory-approved Standard Operating Procedure (SOP) is essential.
Presented below is the definitive technical guide for applying a long-lasting, high-performance garage floor coating system that withstands the rigors of time, chemicals, and substantial loads.
Step 1: Substrate Preparation (The Step 90% of People Skip)
Let us acknowledge a fundamental truth in the industry: epoxy will not adhere to a concrete slab that is dirty, oily, or sealed. More than 90% of failures in floor coatings can be attributed to inadequate substrate preparation rather than the quality of the product itself.
- Deep Chemical Cleaning: It is essential to eliminate all grease, tire marks, oil stains, and loose debris. For persistent stains, employ an industrial-strength degreaser. Any remaining grease will function as a bond-breaker.
- The Moisture Vapor Test: This phase is critical for diagnostics. Secure a 2ft x 2ft plastic sheet firmly to the concrete floor using duct tape for a duration of 24 hours. Should moisture droplets or condensation appear beneath the plastic, it indicates that your slab is experiencing excessive hydrostatic pressure, signifying that the floor is too moist for direct resin application.
If your flooring does not pass the moisture test, it is essential to use a specific Concrete Bonding Adhesive to prepare and seal the slab prior to painting.
- Structural Repair: Avoid applying a coating over existing cracks or depressions. Ensure that all voids, spalls, and fine cracks are filled with a robust epoxy concrete patch or resin mortar filler, and permit it to cure completely.
- Mechanical Etching or Diamond Grinding: To establish an optimal mechanical bond, the smooth pores of the concrete must be opened to resemble the texture of medium-grit sandpaper (targeting a CSP 2 or 3 profile). You may acid-etch the concrete with muriatic acid, or for more advanced industrial uses, employ a planetary diamond grinder. Thoroughly rinse the floor with clean water and allow it to dry for a minimum of 24 to 48 hours before continuing.
Step 2: Mixing the Epoxy (The Chemical Hydration)
Most high-quality industrial and commercial systems consist of a two-part formula, which includes Part A (Resin) and Part B (Hardener). The mixing process initiates the molecular polymer cross-linking.
- Precise Mechanical Blending: Avoid stirring by hand. Introduce Part B into Part A. Utilize a mechanical paddle mixer connected to a low-speed drill (below 400 RPM to prevent incorporating air bubbles into the chemical mixture). Blend thoroughly for a duration of 3 to 5 minutes, ensuring that you scrape the sides and bottom of the mixing bucket.
- Respecting the Induction Time: After mixing, allow the chemical blend to rest undisturbed in the bucket for the induction time specified by the manufacturer (generally around 10 minutes). This period enables the chemical reaction to stabilize prior to application.
⚠️ Critical Warning: Monitor your pot life closely. Once mixed, industrial epoxy cures rapidly (usually within 1 to 2 hours, depending on the ambient temperature). It is essential to work efficiently in organized teams.
Step 3: Implementation of the System
Once the induction window has closed, time is of the essence. Segment your application area into manageable, strategic sections, approximately 10 ft × 10 ft blocks.
- Cutting In the Perimeter: Employ a high-quality 3-inch nylon paintbrush to "cut in" and apply paint to all edges, corners, expansion joints, and difficult-to-reach areas along the walls initially.
- Rolling Out the Body Coat: Utilize a 3/8-inch or 1/2-inch shed-resistant, lint-free nap roller. Dispense the epoxy floor paint onto the concrete in a continuous ribbon and roll it out in thin, uniform layers using a cross-hatch "W" or "M" pattern. This method guarantees consistent film thickness and removes roller marks.
In premium commercial environments such as upscale cafes or minimalist boutiques, consider our factory's customizable Artistic Micro-cement Flooring or Epoxy Colored Sand Floor System to achieve a remarkable, seamless visual effect.
- Broadcasting Decorative Flakes: When installing a decorative anti-slip surface, manually broadcast your vinyl color flakes or quartz aggregates right after rolling out a section. Toss the flakes high into the air to ensure they fall evenly onto the wet epoxy film.
Step 4: Curing and Cross-Linking Timeline
Resin flooring systems necessitate a period to achieve complete chemical and scratch resistance. It is important not to expedite this stage.
- The Recoat Window: Should your project specifications call for a robust second coat or a protective UV-stable clear topcoat, allow a minimum of 12 to 16 hours, but no longer than 24 hours after applying the first coat. Surpassing 24 hours may result in the first coat curing too rigidly, which would require sanding the entire floor to establish a mechanical profile once again.
- The Waiting Period: Foot Traffic: Ensure that all foot traffic is prohibited on the newly coated floor for at least 24 hours.
- Vehicular Traffic & Heavy Loads: Refrain from driving vehicles, parking forklifts, or placing heavy machinery on the surface for a minimum of 3 to 7 days to avoid hot-tire pickup and irreversible chemical indentation.
Why Collaborate with a 20-Year Source Factory?
For large-scale engineering contractors, commercial interior designers, and international distributors, purchasing retail DIY kits from a local big-box store is inadequate for industrial settings.
As a professional source factory with 20 years of experience and a 7,000-square-meter facility, we offer fully compatible and certified coating systems, including anti-alkali primers, concrete bonding adhesives, heavy-duty industrial floor coatings, and artistic wall paints.
Are you looking to specify a high-durability coating system for your upcoming retail, warehouse, or architectural project? Reach out to our foreign trade engineering team today for tailored OEM/ODM formulas, comprehensive A+ and CE certification support, and factory-direct wholesale pricing.